
There has been a recent increase in interest in this post. I have attempted to add instructions to help those wanting to create their own. Please let me know if you need more info.

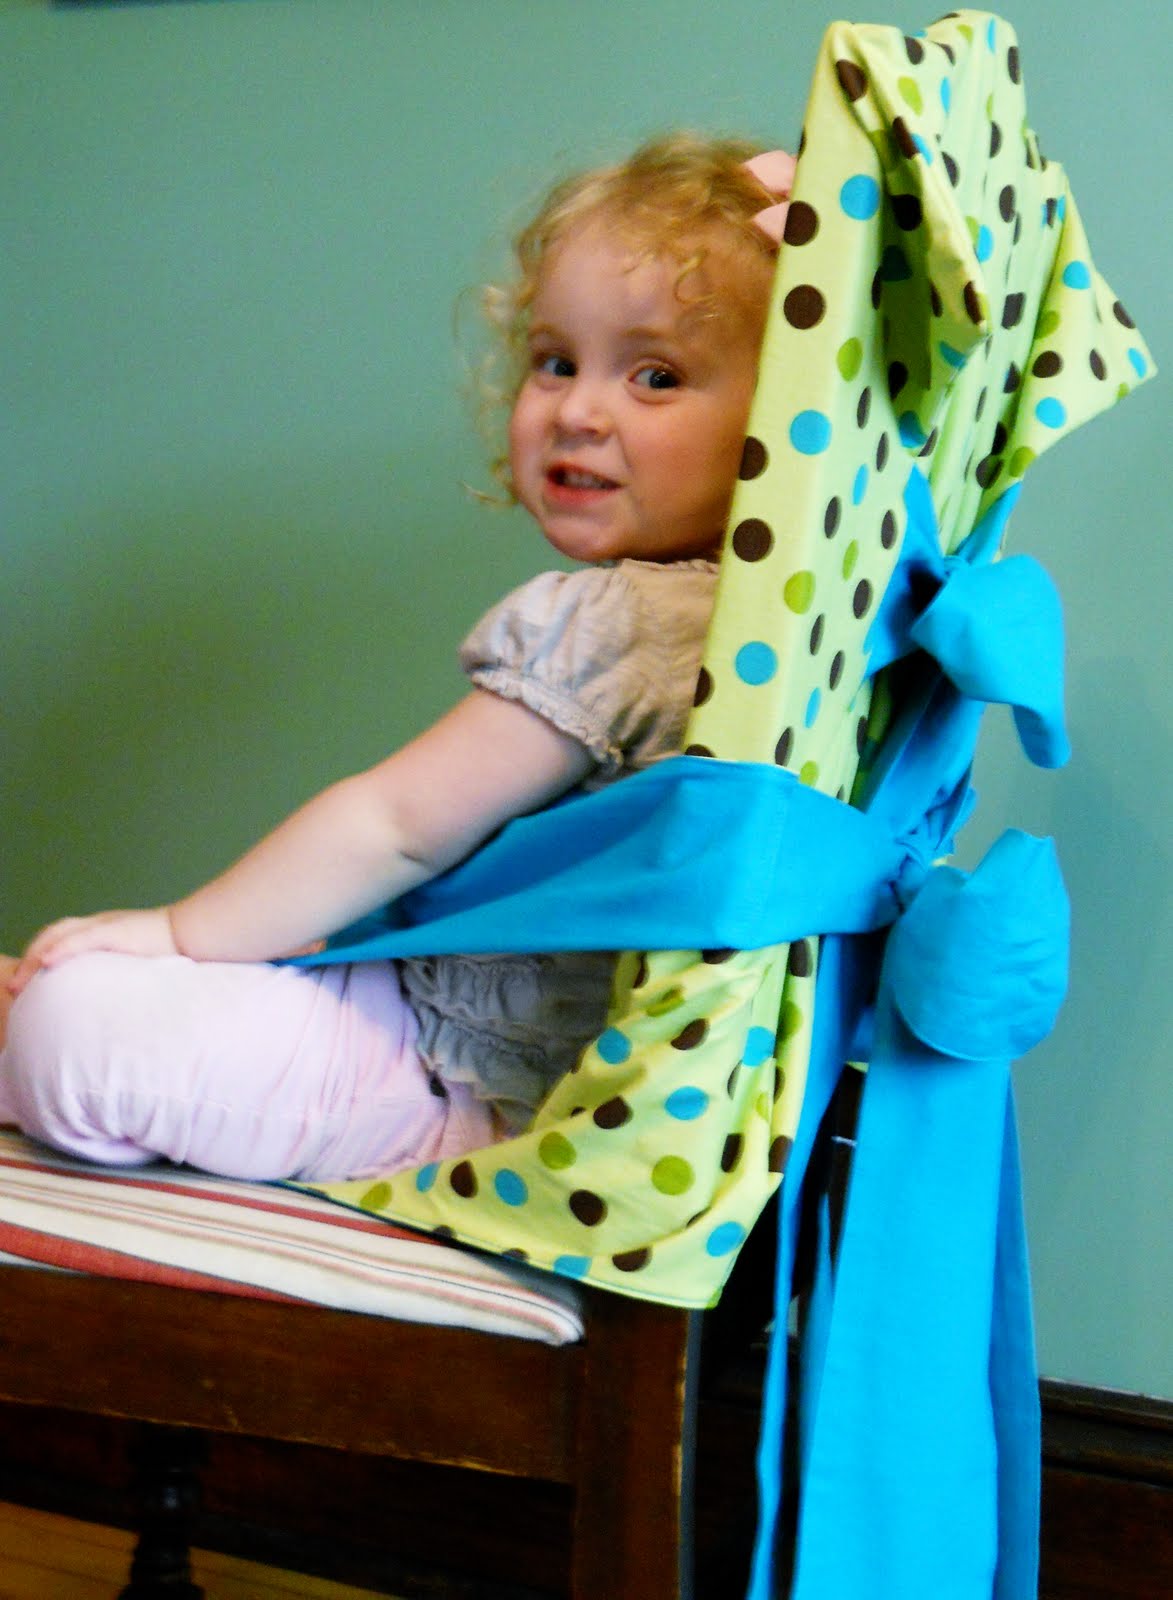
There have been several times over the last 8 years when I really needed a portable highchair. Visiting the In-Laws, friends, church functions, etc... When I realized that I could be without a highchair for up to 90 days when we move and we would be visiting family again - I decided I had to have something and I had to have it now. I saw pictures of a cute Tie Chair and so I came up with my own version.
I didn't have mine tie in front (even though I love the bow in front) because my kids spill so darn much, I figured it would get gunky after one use!

*******************************************************************************
For those How Did You? Requests
This is not a full tutorial, I saw the idea and copied and don't want to take credit for creating this design.
These are my original notes, so hopefully it all works out.
Created with 1/2" seam allowances.
Cut 2 rectangles (I did one polka dot and one teal) 27 3/4" x37 1/4"
Cut 1 rectangle (polka dot, this creates the back pocket for the chair back to slip inside)27 3/4" x21 5/8"
For the ties, cut 8 at 5" x 44"
Here is a rough sketch showing finished measurements. Like I said - rough sketch. Let me know if you have more questions.

**************************************
A second attempt at making this a tutorial. There will be no step by step pictures.

Here are the pattern pieces, by dimension. You will have to measure and cut the rectangles and grab a plate or bowl to get the leg cut-outs so you like them.
1. cut out the pattern pieces according to measurement. On the two large rectangles, you will cut out two semi-circles leaving 10 1/4" wide at the narrowest point.
2. Sew your ties. Place two pieces right sides together. Sew leaving one end open, you can choose to sew the one end at an angle - but it is optional. Right side them out, work your corners to nice and pointy. Iron and top stitch if you choose.
3. Take the small rectangle and hem one edge (27 3/4"). Fold and press under a half inch, fold under another half inch (double folded). Iron and top stitch.
4. Layer your rectangles, all three are going to be sandwiched together. Lay your front down right side up, Place your ties and pin then. Be sure to secure the loose ends or you might catch them while you are sewing everything together. Then place your smaller rectangle (line up the un-hemmed 27 3/4" edge) right side down on top of your laid out pieces, on top will be the back side (mine was teal) right side down. Pin the edges together. (make sure your ties are not going to end up sewn down in the wrong places).
5. Leave an opening so you can turn everything to the right side. Turn everything to the right side. Be sure you layer correctly so you don't have to unpick!! Tuck and press in your raw edges at your opening and either hand sew closed or top-stitch all around for a nice finished look.
6. Iron and tie it on!!
7. If you have any further questions feel free to comment and I will try to answer them. Try to be as specific as possible in your question.
Original posted on 5/13/10


