Showing posts with label tutorial. Show all posts

Wednesday, March 27, 2013

Ichigo Daifuku - a tutorial


 photo MochiParty.jpg
This is my friend and her two Japanese neighbors who taught us how to make mochi.  They were so sweet and their English is amazing, left me wishing my Japanese was better!

My latest Japanese favorite wagashi (Japanese confection made of mochi, azuki bean paste, and fruit) is Ichigo Daifuku.  This is a strawberry stuffed mochi, and it is so yummy.

The first time I had Mochi (Rice Cake) I didn't really love it, it has a strange texture and flavor.  Too much of a good thing, maybe.  A rice cake is about the size of you palm and made entirely of mochi and might be flavored.  Mochi has the consistency of a dough.  However, when stuffed with sweet beans and strawberry it is super yummy.

There are lots of tutorials available on how to make Mochi, this is how I was taught.  A friend arranged for her neighbors to teach a couple of us Mochi addicts how to make Ichigo Daifuku.  We made about 30 that day.  We made the mochi in 2 batches because if it cools you can't shape it or get it to stick around the strawberry.

Ingredients:  Makes 6 (I think a few more, these were a little big)
Shiratamako (glutinous rice flour)  100g
Sugar  20g
Water  150cc
Strawberry  6+
Anko (sweet red bean paste)  30g/each  *****I think 15g/each is better*****
Katakuriko (potato starch) or Corn Starch for dusting

 photo Shiratamako.jpg photo Anko.jpg
On the left is a bag of Shiratamako.  On the right is a bag of Anko,  you can also get it in a can.  I was told that the Anko in a can is wetter and harder to work with for mochi.

Directions:
1.  Preparation:
Remove stem from strawberries.  Wrap strawberry with Anko and round to make ball (you want the tip of the strawberry to peak through).  Have some water in a bowl to use for your hands to keep things from being so sticky.  If your hands are a bit damp the Anko doesn't stick to you as much.

 photo Ankowrapping.jpg photo AnkoStrawberry.jpg

 photo Ankowrap.jpg

 photo wrapped.jpg


2.  Measure out dry ingredients. Put Shiratamako and Sugar in a heat resistant bowl and mix.


 photo measuremochi.jpg

 photo drymixing.jpg

3.  Pour water into the bowl, gradually.  Mix until smooth.

 photo mixsmooth.jpg

 photo Addwater.jpg

4.  Loosely cover with saran wrap.  Put the bowl in the microwave and heat for 2 minutes and stir the dough.  Heat the dough in microwave until the dough becomes clear (2 min - 1 min each time).  Stir the mochi quickly.  If you dip your spatula in water the mochi will not stick to it as much.

 photo cover.jpg

 photo heatedmix.jpg
This is the early stage of cooking, you can see how white the dough is.
 photo microwavestir.jpg
This is when the dough is done, you can see that is clearish compared to the previous picture.  It does not turn completely clear.

5.  Dust a flat pan, plate or table with some Katakuriko.

 photo dumponpowdered.jpg

6.  Remove the hot mochi from the bowl to the dusted surface.  The mochi is hot and sticky so be careful!!  Dust the top of the mochi.

 photo powdertop.jpg

7.  Dust hands with more Katakuriko and divide the mochi into 6 or more pieces.  You can use a pastry scraper, they work great.

 photo dividemochi.jpg

8.  Make 6 flat and round mochi.  Grab a piece and pat it out.   Be sure to not get it too thin, especially in the center.  
 photo flattenmochi.jpg

9.  Wrap anko/strawberry in the mochi.  Place the point of the strawberry down.  Pinch closed and use Katakuriko to keep the mochi from sticking to you and to the container you are going to store it in.  When you have it all wrapped up you kind of roll the mochi in your hands to smooth the outside and shape it nice.

 photo strawberrydown.jpg

 photo pinchmochiclosed.jpg

 photo done.jpg


Notes:
I have made mochi several times now and I will tell you that volume measurements don't work as well. You can also use Mochiko flour - the recipe is a little different as is the flavor and texture.  The differences are subtle, so most people wouldn't know the difference unless they have them side by side. Use good strawberries!  You want to see a bit of pink peaking through the top of Ichigo Daifuku.


 photo plateof.jpg

Thursday, November 15, 2012

Sugared Cranberries, a tutorial

Photobucket

I know I haven't done a tutorial for awhile.  It is not easy to make lots of great things with 4 little ones and living in Okinawa.

Sugared Cranberries have become a fall tradition since I was introduced to them about 8 years ago by a friend of mine.  I love them and usually can eat a few bags of them each fall.  If I was living in the lower 48, I generally make these after Thanksgiving and into December.  However, living in Okinawa demands that it be done much earlier.  The cranberries just don't seem to last as long.

First you will need to gather:
1 bag of fresh cranberries
Colander
Sauce pan
Slotted spoon
Sugar
Water
Bowl
Cookie Sheet

1.  First you need to wash your cranberries and sort out any bad ones.  They are usually bad if they have soft spots/completely soft or have black/dark spots on them.

2.  Bring to a boil in your sauce pan 1 cup of water and 1 cup of sugar.  As soon as it boils turn if off and let it cool down.

3.  Once the syrup you made has cooled enough you will add the cranberries.  To check to see if the syrup has cooled enough toss in one cranberry.  If it splits or pops then it is too hot.  You want the syrup as warm as the cranberries can stand without them popping.  It is okay if a few of them pop, but you are not making cranberry sauce.

Photobucket

4.  Let the cranberries steep in the syrup for a few hours or over night (I usually put mine in the refrigerator after awhile and leave it until morning).

Photobucket

5.  Place some sugar in a bowl, 1/4 cup or less at a time.  I usually use regular granulated sugar.  You can use finer sugar or courser sugar depending on the look you like.  Use your slotted spoon and spoon a few cranberries at a time into the bowl and gently shake them around to coat them with sugar.

Photobucket

6.  Place the cranberries on a cookie sheet to dry (I usually leave mine for most of the day or over night) in the refrigerator.

Photobucket

7.  Place in a container to share with friends and family.  Keep refrigerated and enjoy!

Photobucket


Wednesday, May 2, 2012


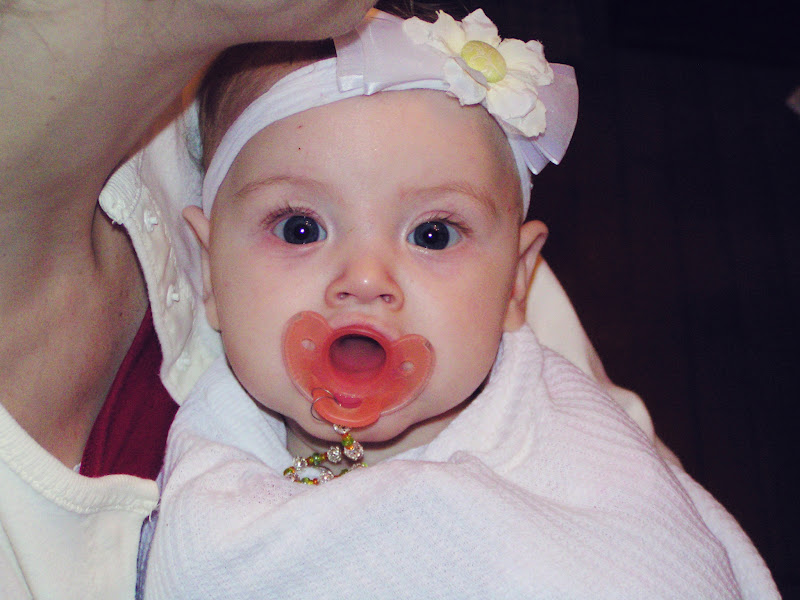
What do all of these pictures have in common?  Pacifier Clips.  I have had lots of interest in my pacifier clips and thought I would share how I made mine.  WARNING:  NEVER PUT A CHILD TO SLEEP WITH THIS CLIP.  NEVER LEAVE A CHILD ALONE WITH BEADED CLIPS, SMALL PARTS, CHOKING HAZARD.  THIS TUTORIAL IS PROVIDED FOR YOU PERSONAL USE AND YOU ARE RESPONSIBLE FOR ANY ITEMS YOU PRODUCE AND USE. These pacifier clips are decorative and can and do break.  Charlotte and Tennyson have both used these, so over the past 4 years I have restrung a few times.  Some survived for 4 plus years.  I have a few tips to save you a few headaches.


Supplies:
Beads - whatever kind you like.  I have used natural stone beads, plastic, and metal beads.
~10 inches Flexible Wire -  mine has a diameter of 0.14 in (great for seed beads) and has a test strength of 10 lbs.  The wire will break if yanked on hard enough and I want it to break if it is getting yanked on very hard.
Crimp Beads - to secure clasp and the end loop.
Clasp - I found mine at JoAnn's or Michaels
Crimping Pliers - Found in the jewelry supply section.

1.  Design your pacifier clip, lay out your beads.

Photobucket

2.  String your beads onto your wire.  I don't usually cut min, until after I have the beads all strung.

Photobucket

More about the clasp.  I found it at JoAnn Fabric or Michaels in the bead area with all the other jewelry supplies.  I like it because it clips easily onto the neckline or collar of any outfit.  It does not damage any of the clothing.  I have had it clipped on velvet and it left no permanent mark.  It is spring loaded, so I just push it onto the neckline until the fabric slips through.

BinkyClip_0008Photobucket

3.  Place two crimp beads on the wire and then the clasp.  I use 2 beads because then if it breaks, I usually have at least 1 crimp bead remaining to keep the beads from going everywhere.  (It usually breaks near the clasp or in the loop from attaching to the pacifier).

Photobucket

4.  You will then thread the tail back through the crimp beads.

Photobucket

5.  You will use the crimp bead pliers to crimp the bead.  Securely attaching the clasp.  The website Beading for Beginners shows you how to do this.  If you have any other questions about beading, they would be a great tool to use.  There are lots of tutorials out there on beading, this is the first one I came across to share.  This is a picture of the pliers (courtesy of Amazon.com)

Photobucket

6.  Now your clasp is attached,  you can now cut your wire (if you haven't).  Cut your wire leaving a 2-3" tail.  You then place two more crimp beads on the wire.  Create a loop by threading the tail back through the crimp beads and some back through the decorative beads.  I like about an 1.5 inch loop.

Photobucket

7.  Crimp the beads and you are done.  Your finished clip should be about 7.5 inches long.

8.  The last step is to thread the loop through a hole in your pacifier (the handle or little holes) and then thread the clasp end through the loop to secure it to the pacifier.

I am sure you could use larger beads - wood, metal or stone and make a great boy version.  Again, please remember that they should never sleep with the clip or be left alone with it.

Thursday, January 19, 2012

Another Harry Potter Wand Tutorial


Grahm asked for Harry Potter wands for Christmas.  Jason and I could not even think of buying the plastic model and I was not going to shell out the money for the nice wood version.

I know there are lots of tutorials out there.  I might have even done mine the same way as someone else, without realizing it.  I read a tutorial that made the wands out of paper and decided that paper would save my kiddos eyes, but be broken in .5 seconds.  So I used the ideas, but used very long chopsticks as the base.  One day Jason will have time to carve some, but by then they will have moved on to other interests.

How to make your own Harry Potter Wand:
You will need:
Chopsticks in desired length (mine are 13" long)
Heavy duty scissors
Hot glue (lots of it)
Hot glue gun
Fine grit sandpaper (120, 150, or higher)
Spray Primer
Craft paints in desired colors
Spray clear coat
Jar
beans or rocks
Opt:  Kitchen torch


Step 1:  Cut off the sharp point of the chopsticks.  There was no science behind how much I took off.  I didn't want the ends too sharp.

Step 2: Lightly sand the finish off of the chopsticks.

Step 3:  Warm up your glue gun.  You will start applying glue where every you want it.  I started on the handles.  I put some on and then kept rotating the chopstick to keep the glue from dripping off or forming any shape I didn't like.  I rotated it in a circle, end to end.  Just keep it moving.  You will get the hang of how the glue is going to act and you will be able to manipulate it to get the shape you like.  If you end up with something you don't like you can easily rip off the glue at this point.  Or grab you kitchen torch and warm the glue back up (it is okay if it browns a little on the outside).  Keep adding glue until you are happy with it.  (I fell in love with hot glue again.)  For the Elder Wand, I used a plastic chopstick dipped in water (too keep the glue from sticking to it) and as the glue cooled I poked the glue to make indention's.

When you are happy with it, place in jar with beans or rock to keep the glue from resting on anything until completely cooled.

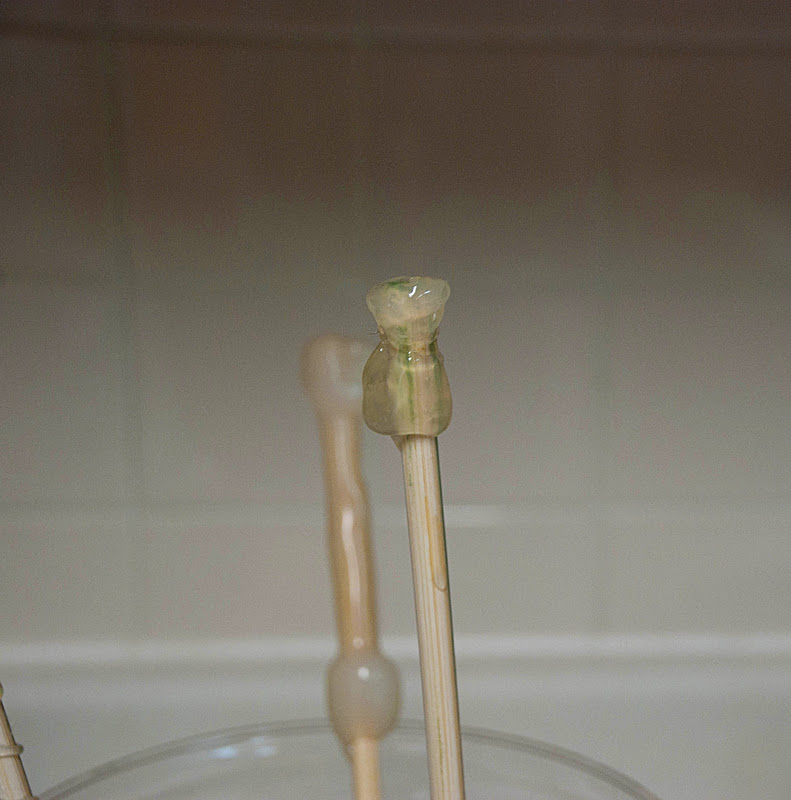
In the picture you can see the Harry Potter wand in the back and the beginnings of the Elder Wand.
Step 4:  After you have the shape you want take it outside and place in jar with beans and spray with a primer.  After it is dry you can take it out and hold it while you spray the end.


Step 5:  Use the craft paint to paint your wands as you desire.  To darken the grooves, wait until the base coat is completely dry and then dab darker paints in the grooves and quickly wipe off excess before you soften the base layer.  Use lighter colors and darker colors to mimic the look of real wood.  It is hard to see in the pictures.

Step 6:  Place in jar of beans outside and spray a clear coat to protect your hard work.  Again, hold it to spray the end after the handle is dry.


We still have not had any accidents with our wands.  The kids enjoy playing and casting spells.

Friday, August 26, 2011

Kitchen Color Pop


Living in Military housing has its ups and downs.  Here the kitchen is entirely tiled - nice - but no walls to add color with.  Since I don't spend lots of time in there (the room is very closed off feeling).  I wanted to add a pop of my kitchen colors without spending lots of time or money.  So this idea might not be new, but inspiration hit - so I thought I would share...

This would be a fun idea for a wedding gift, find a thrifted knife block or buy a new one and make it theirs.  This project didn't cost anything, I had everything on hand.

You will need:
Knife block
Sandpaper
Paint (brush - maybe)
Clear Coat
Monogram (vinyl or a stencil and paint)

1.  First use fine sandpaper, the finer the better (higher number grit), and roughen up you knife block.  This will let you paint without having strip the existing finish.


2.  Use a slightly damp rag and wipe the block down.  You want it clean before you paint.


3.  Grab your paint and paint.  I originally started with spray paint, but color selection here is not too great.  I switched later that night to craft paint and a sponge brush.  Then apply a clear coat to protect your paint from all those knife blades.


4.  Apply your vinyl monogram or use a stencil and paint it on (use clear coat to seal your paint).  Then put your knives in and love the new color in your kitchen.