
There has been a recent increase in interest in this post. I have attempted to add instructions to help those wanting to create their own. Please let me know if you need more info.

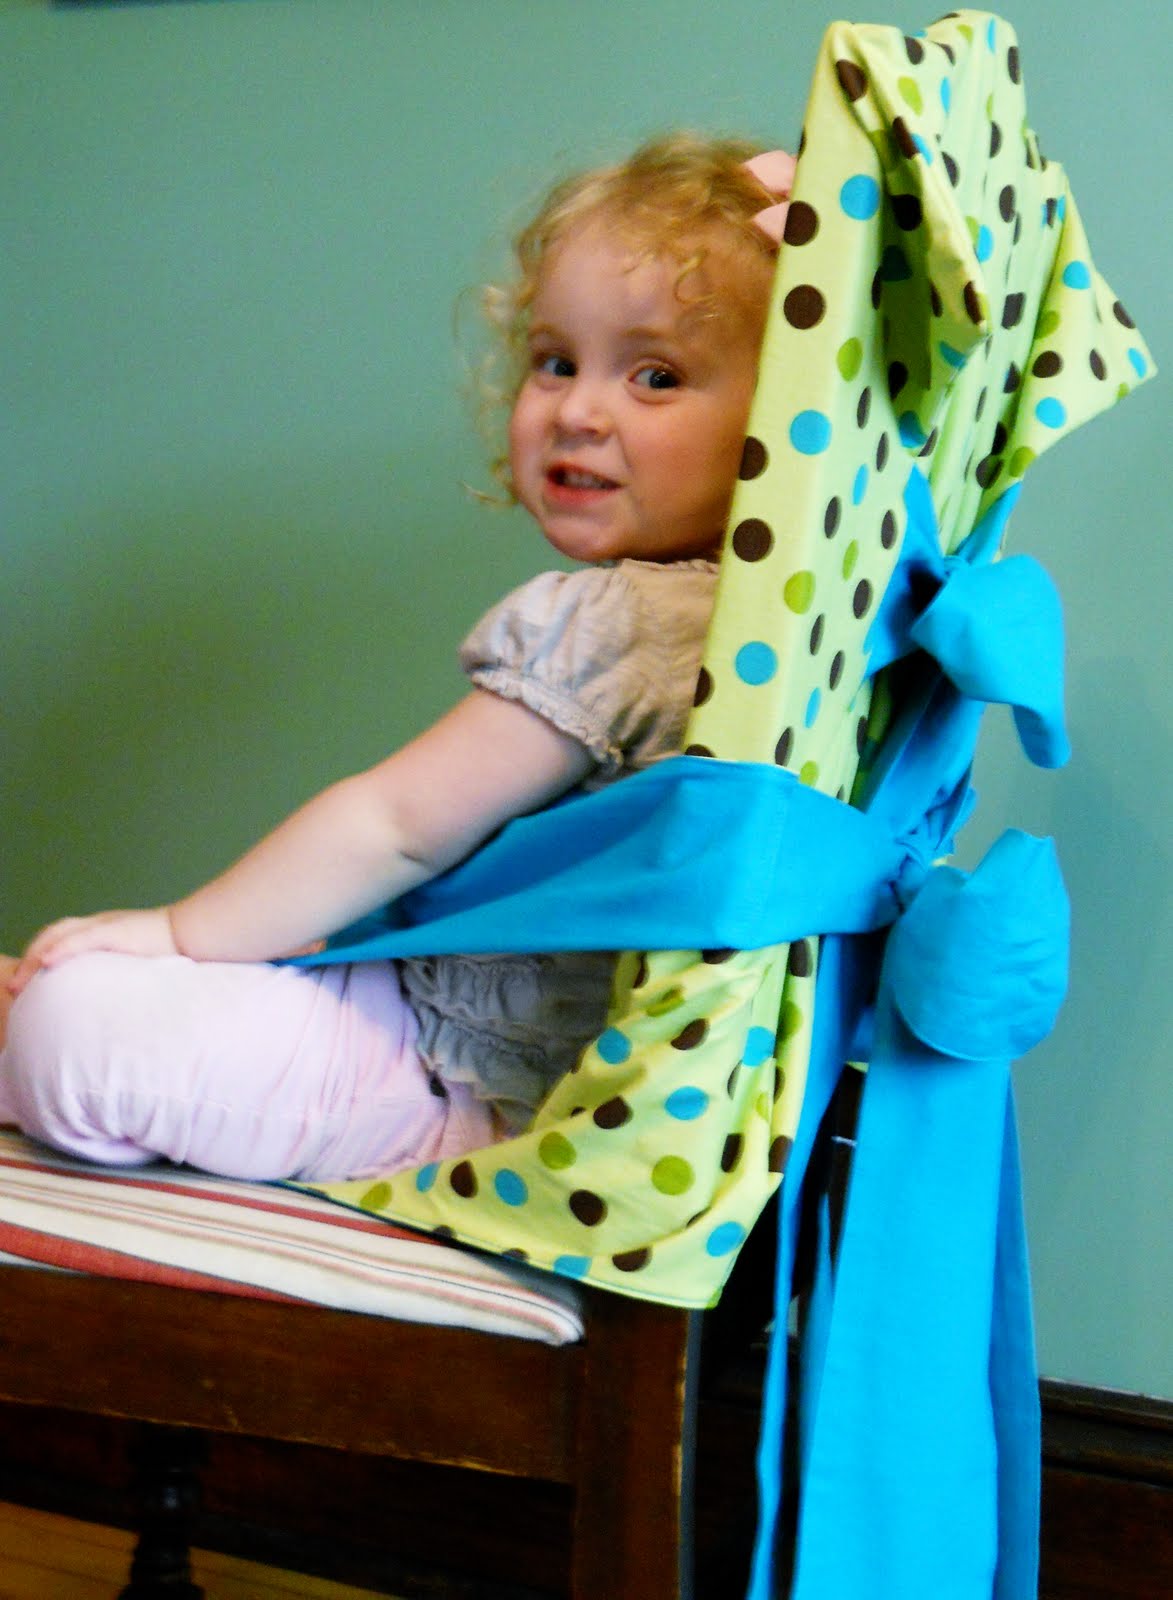
There have been several times over the last 8 years when I really needed a portable highchair. Visiting the In-Laws, friends, church functions, etc... When I realized that I could be without a highchair for up to 90 days when we move and we would be visiting family again - I decided I had to have something and I had to have it now. I saw pictures of a cute Tie Chair and so I came up with my own version.
I didn't have mine tie in front (even though I love the bow in front) because my kids spill so darn much, I figured it would get gunky after one use!

*******************************************************************************
For those How Did You? Requests
This is not a full tutorial, I saw the idea and copied and don't want to take credit for creating this design.
These are my original notes, so hopefully it all works out.
Created with 1/2" seam allowances.
Cut 2 rectangles (I did one polka dot and one teal) 27 3/4" x37 1/4"
Cut 1 rectangle (polka dot, this creates the back pocket for the chair back to slip inside)27 3/4" x21 5/8"
For the ties, cut 8 at 5" x 44"
Here is a rough sketch showing finished measurements. Like I said - rough sketch. Let me know if you have more questions.

**************************************
A second attempt at making this a tutorial. There will be no step by step pictures.

Here are the pattern pieces, by dimension. You will have to measure and cut the rectangles and grab a plate or bowl to get the leg cut-outs so you like them.
1. cut out the pattern pieces according to measurement. On the two large rectangles, you will cut out two semi-circles leaving 10 1/4" wide at the narrowest point.
2. Sew your ties. Place two pieces right sides together. Sew leaving one end open, you can choose to sew the one end at an angle - but it is optional. Right side them out, work your corners to nice and pointy. Iron and top stitch if you choose.
3. Take the small rectangle and hem one edge (27 3/4"). Fold and press under a half inch, fold under another half inch (double folded). Iron and top stitch.
4. Layer your rectangles, all three are going to be sandwiched together. Lay your front down right side up, Place your ties and pin then. Be sure to secure the loose ends or you might catch them while you are sewing everything together. Then place your smaller rectangle (line up the un-hemmed 27 3/4" edge) right side down on top of your laid out pieces, on top will be the back side (mine was teal) right side down. Pin the edges together. (make sure your ties are not going to end up sewn down in the wrong places).
5. Leave an opening so you can turn everything to the right side. Turn everything to the right side. Be sure you layer correctly so you don't have to unpick!! Tuck and press in your raw edges at your opening and either hand sew closed or top-stitch all around for a nice finished look.
6. Iron and tie it on!!
7. If you have any further questions feel free to comment and I will try to answer them. Try to be as specific as possible in your question.
Original posted on 5/13/10


29 comments:
That turned out so cute! Love the fabric/color choices. I'll definitely be interested in making one for Violet when she's a bit bigger.
I am really wanting to make one of these but can't zeem to find a pattern. Can you give me some help?
Kimmie, Do you need a detailed pattern or just a general idea with dimensions?
I would LOVE detailed if possible but if I am only able to get general I will figure it out. Are you able to see my e-mail? You can e-mail it to me if that is easier. Thanks! :)
I'm would still love to have even a little help in making one! :)
Sorry, life has been nuts. I will get some basic instructions put together for you tomorrow. Thanks again!
Kimmie, Let me know if you need more info that what I added to the post. Best of luck! Thanks again for reading. I love my readers.
I would really love to make this but wanted to know if you could give me detailed instructions? If not that is fine too very very cute!!
Could you, email me more detailed instructions thanks mikeandkelly1031@hotmail.com
I would love a more detailed tutorial if you've put it together for others plse. My email is dpclovely@gmail.com
Many thanks
Deanne :)
I too would love more detailed instructions. With 13 grandchildren and twins on the way, my daughters would love this!! My email is kspaugh75@comcast.net. Thank you so much!
I would love a more detailed instruction if possible. Would be great for my grandchildren. My email is susanryant@hotmail.com. Thank you so much if you find the time to send it. Greatly appreciate it. Susan.
If you're sharing detailed instructions, please send me some. My fourth grandchild is due in December and his mother has requested one of these. Thanks very much. Pam Frederick pamfrederick@gmail.com
If you're sharing detailed instructions, please send me some. My fourth grandchild is due in December and his mother has requested one of these. Thanks very much. Pam Frederick pamfrederick@gmail.com
If you're sharing detailed instructions, please send me some. My fourth grandchild is due in December and his mother has requested one of these. Thanks very much. Pam Frederick pamfrederick@gmail.com
Hi,
I would love detailed instructions also, if you have time. I would appreciate any help you can give me. Thank you.
Valorie
I love the idea. going have 2 grand daughters . would like to make them one. email deb625@gmail.com.. thanks so much
deb
Thank you for your interest. Do the added instructions help?
This is such a great idea! Could you please email me detailed pattern/instructions? Nadine.a.wilson@gmail.com
Thank you :)
This is super! I really would like to do it, but as it is my first sewing job I really need more help... Could you please email me more instruction? simona.varesio@gmail.com
Great pattern. What type of material did you use? I'm going to give it a try. Thanks!
Do you have MORE instructions? How much fabric should I purchase? More details would be great. If you have this information or instructions I would love it... TWINS on the way with a toddler already in the lap.
The teal, if the fabric is 45" wide then 68" or 1.889 yards. The polka dot, 49" or 1.361 yards.
Let me know if you have any other questions.
This is really cute and a good idea. I would like to try to make this. Can you email me more detail instructions and patterns? My email is rutilia2004 @yahoo.com
Thank you
cool
I WOULD LOVE TO MAKE THIS FOR MY GRANDSON, AS WE HAVE A HARD TIME, WHEN WE TAKE HIM TO A CAFE, THIS WOULD BE PERFECT, IF I COUKD JUST SEE A COUPLE MORE PHOTOS OF WHERE THE TIES ARE SEWN INTO. AND WHAT PARTS TO LEAVE OPEN, ALSO WHERE DOES THE SMALL OBLING ATTACH TO THE LARGE OBLONG. I DONT THINK ANYONE WOULD ACCUSE YOU OF COPYING AS YOU JUST STATE WHIS ORIGINAL PATTERN IT WAS. HOPE TO HEAR FROM YOU. GEORGINA IN SCOTLAND. !!!!
I WOULD LOVE TO MAKE THIS FOR MY GRANDSON, AS WE HAVE A HARD TIME, WHEN WE TAKE HIM TO A CAFE, THIS WOULD BE PERFECT, IF I COUKD JUST SEE A COUPLE MORE PHOTOS OF WHERE THE TIES ARE SEWN INTO. AND WHAT PARTS TO LEAVE OPEN, ALSO WHERE DOES THE SMALL OBLING ATTACH TO THE LARGE OBLONG. I DONT THINK ANYONE WOULD ACCUSE YOU OF COPYING AS YOU JUST STATE WHIS ORIGINAL PATTERN IT WAS. HOPE TO HEAR FROM YOU. GEORGINA IN SCOTLAND. !!!!
Can you say wgere to place the ties, as you only say to sabdwuch everything together. Can you send me details of where the ties are to be placed. Would be so grateful. georgina.clinton@gmail
Love this! Could you please send me detailed instructions? Mtblankets@aol.com. thank you!
Post a Comment