Thursday, March 31, 2011

Random Ruffles Pillow Tutorial


1.  First you need to cut out your fabric.  For one pillow you will need:
        2 squares cut to the size of your pillow
        several bias strips 1" wide.
2.  To determine your pillow size if you are using a pillow form.  Measure you pillow form and cut your squares to this size or slightly smaller for a nice full pillow.

3.  To cut 1" bias strips you cut your fabric at a 45 degree angle to your selvage edge.  My ruler has this angle marked for easy cutting.  Fabric cut on the bias is does not fray and has a more stretch.


4.  Next you need to sew your bias strips together.  You place them right sides together and at a 90 degree angle.  You will sew them together on the line I have marked with a push pin.  (Sorry about this picture).


5.  Then you will press you seam open and trim any little bits that stick out.  Your joined bias tape should look like in the picture above.  Join several pieces together, you can always trim off any extra at the end.

6.  Using the longest stitch on your sewing machine sew down the center of your bias strip.  A gathering thread.


 7.  Now you will pull one of the threads to create ruffles.  I like to pull from both ends, so if I have it too ruffly I will not be pushing ruffles off the thread (in case I need them later).


9.  Once you have your bias strip ruffled you will then take you pillow top and working on the right side you will start pinning the ruffle down randomly.  I did not want a loose end so I started mine off the edge.  If you are going to cross over your ruffles, like making a loop, then don't pin all of your ruffles down.  You could also draw or mark out your entire design.  I just went for it.


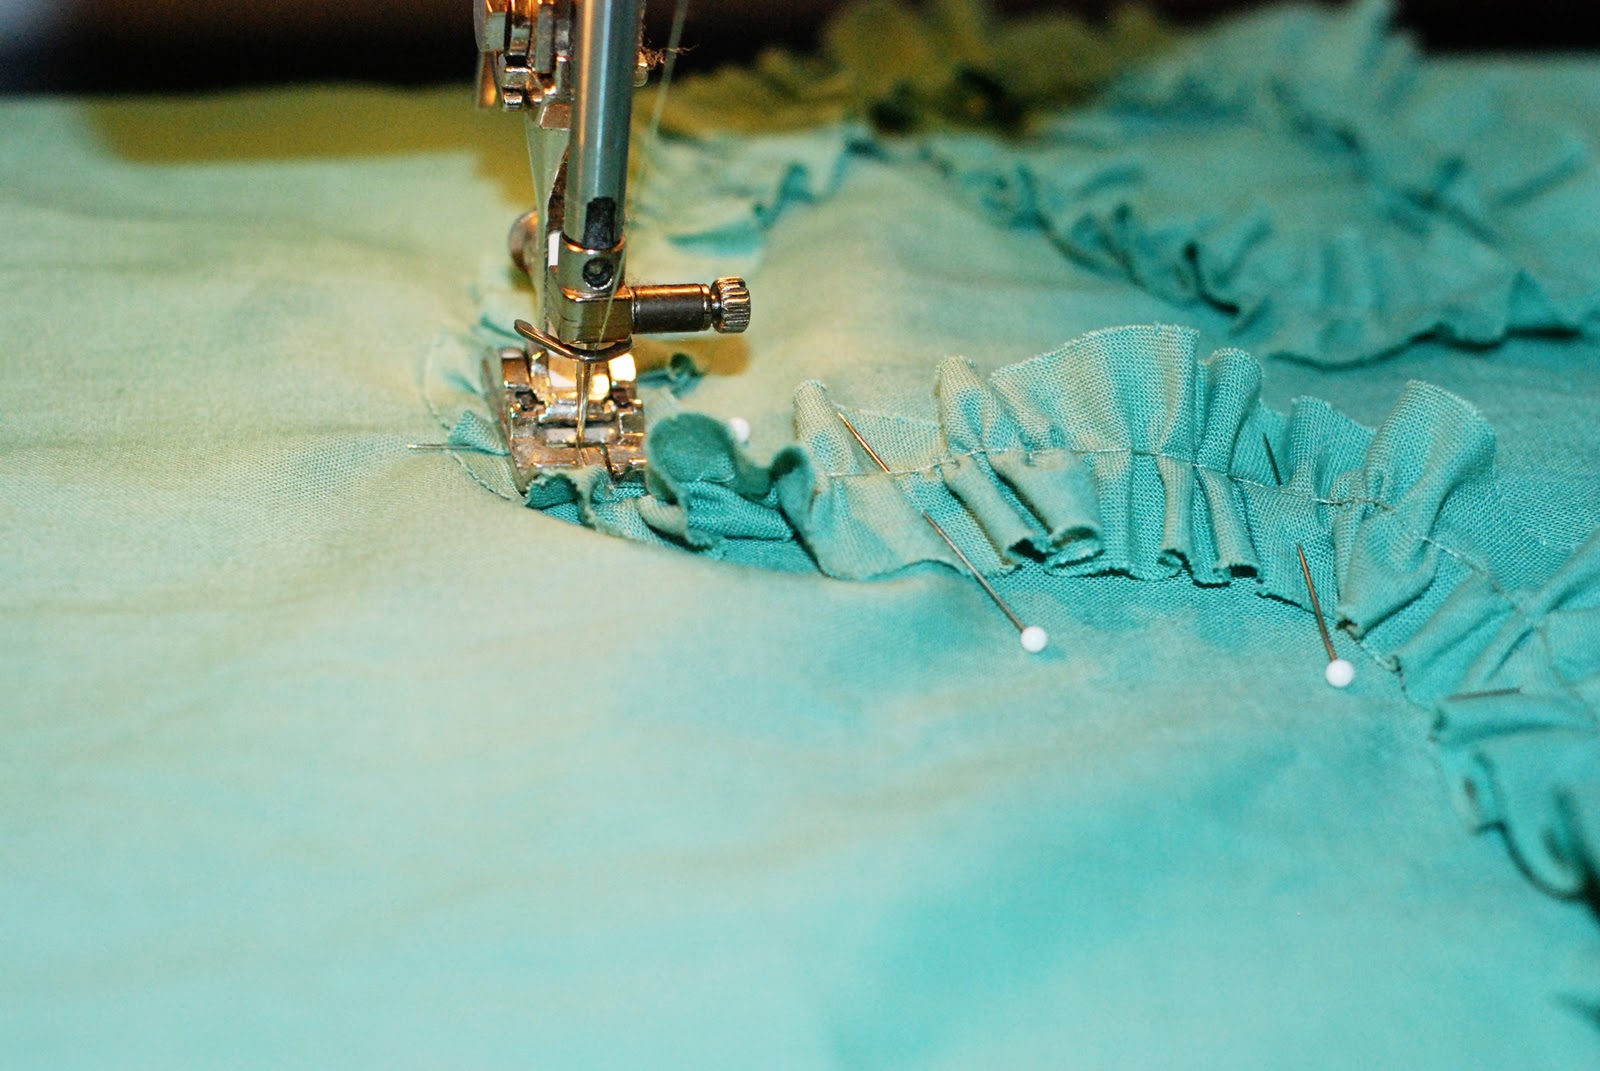
10.  Then you will top stitch your ruffle down by sewing down the middle (basically you will be stitching over top of your gathering thread).  When you are nearing the end of your pinned section of ruffles, leave your needle in the down position and start pinning some more.  ***After you are all sewn down, trim off any excess and REMOVE your gathering thread***


11.  After you have your ruffles all sewn down, you will pin you pillow back to your pillow front - right sides together.  I use pins to mark where I will be starting and stopping, so I will leave adequate space for my pillow form or stuffing (back stitch to ensure that it doesn't come apart as you fill it).
***I never like square corners on my pillows, they always look too pointy on the finished project.  To make rounded corners, grab a cup and mark your corners for a rounded look.***


12.  Trim your corners so they will look their best and then turn your pillow right side out. 

13.  Next you will slide your pillow form inside or stuff it.


14.  Now you will grab a needle and thread and hand sew your pillow closed.  You can always top stitch it closed if you prefer.

15.  Throw them on your bed or couch and enjoy.


Wednesday, March 30, 2011

Pillows

 BEFORE

I finally made pillows for our couch.  Ones that match my color scheme.  I was really lucky that I had pillows that matched the pillows that came with the couch or I would have had to do this much sooner.  So, maybe not lucky.

AFTER
 Now I need to do curtains, make more shoes, sew an Easter Dress (only 1), sew some more dresses for church and play, finish my skirt ....

If you like these, I will be posting a tutorial.  Not because I used any earth shattering new methods - but because when I see a project I want to do - I want the tutorial right there.

Monday, March 28, 2011

Happy Birthday Post

Since Jason has the ability to not get a year older each year.  We just randomly pick a day and shower him with gifts and eat too much cake!  We enjoyed steak and cheesecake, of course.  Jason never wants me to do much, but maybe he is just saying that, hhhmmm.  Maybe next year we will go to the clinic and really make a big deal - then I will know if he means it.

You already saw pictures of the mis-marked pants.

I needed a little something for on top.  Who knew chocolate covered sunflower seeds were soooo good.


 Happy Birthday Handsome.  I love you so much.  You are a great Dad and Husband, and the second grouchiest person we know;)

Wednesday, March 23, 2011

100 Days Smarter

When Jayce had to do a 100 Days of School project it involved me sending 100 small items to school.  He came back with the number 100 made up of toothpicks.  For Grahm it was a "family project".

I thought it would be fun to do a project that had to do with Okinawa.  Grahm and I brainstormed and we decided that we should do Shisa Dogs. 


Wikipedia gave this great definition.  Shīsā (シーサー) (Okinawan: siisaa) (shishi or shisaa) is a traditional Ryukyuan decoration, often in pairs, resembling a cross between a lion and a dog, from Okinawa mythology. People placed pairs of shisa on their rooftops or flanking the gates to their houses. Shisa are wards, believed to protect from some evils. When in pairs, the left shisa traditionally has a closed mouth, the right one an open mouth. The open mouth wards off evil spirits, and the closed mouth to keeps good spirits in.

You see Shisa at homes, businesses, entrances to the freeway, etc...  I thought this project might take us awhile, but it only took about 2 hours to collect 100 pictures.  Each picture is a different Shisa.  I love the handmade ones the best.  One of these days I will make it to the pottery area and make my own.


 Since making this poster, we have been further educated that it is a common mistake to call them Shisha.  I was told my Grahm's teacher (who was raised in Okinawa) that it is acceptable to call them Shisha.  However, I think we will change it for us.  Grahm was sick on the day that we put it together.  Jayce, Jason and I had to do it alone while he left us to sleep.  I didn't get a picture until he brought it home.

Tuesday, March 22, 2011

Tennysons First Shoes

For those that I have made baby shoes for, you are probably surprised that Tennyson is almost 6 months old and I have not made her a pair.  So I decided I had better fix that.  I made these cream colored ones really quick.  Now that I have a baby to wear them, I have already noticed some design changes that I need to make (those of you that had some from me - please tell me what you wished I would have done differently).

 I was in a hurry and hadn't turned these very good  - excuse the points and bumps.

Thursday, March 17, 2011

My first knit

This is what I did last night.
I finally bit the bullet and tried out some knit sewing.  For some reason knits strike fear into my heart.  Well - I think I am in love.  This recycle dress is perfect for getting dirty at the park or in our yard.  She can eat bright red popsicles and slide in orange clay dirt and I wont worry or freak out.  I used a pattern from LilBlueBoo.   This dress was once 2 of her Daddy's shirts. 

Tuesday, March 15, 2011

Retail Store Predicted Disaster

I ordered some chinos for Jason before 3/11.  Today he was able to try them on.


I ordered an inseam of 36".  They are marked every where (multiple times) as being 36", they measure 29".  How did the store know we might need to be prepared?

I Hate Returns.

Monday, March 14, 2011

More info!


I hope this map helps everyone to better understand where we are in relation to the Earthquake Epicenter (Orange square) and all of the Tsunami damage.  We are located in the bottom left corner of this map.  The large island at the very bottom is Okinawa.  We are about 1,130 miles from Tokyo.  That is why we didn't feel the earthquake or get the major part of the tsunami waves.

We did have some friends that were evacuated during all the Tsunami warnings.  We still have not heard any reports of damage to anyone here.  It is hard to follow local news, it is in Japanese!  CNN is our source of information and when the base releases any official warnings or information (which is minimal).

Friday, March 11, 2011

We Are Okay

We are under a Tsunami Advisory.  We have not heard of any waves reaching us.  We have been told to stay away from the ocean.

We just wanted to make sure everyone knows that we are okay.  We are off to bed and will have more to say in the morning (or your evening).

Thursday, March 10, 2011

Trying to Catch Up

I have decided that I need to finish up some unfinished projects.  I need to decrease my fabric stash and others. 

I finished up 2 bibs that I started when Charlotte was pretty little.  I had used an iron on vinyl to waterproof Amy Butler fabric.  I wanted to test the vinyl before I finished the other 2.  The vinyl is too thick for the project, so where the bib regularly bends the vinyl cracked.  I need thinner vinyl.  However, I finished these two because they still work even after I rip off the vinyl when it cracks.

Also on the done list is a lamp redo for Charlotte.  It is to match her new quilt - It looks okay, I might have to redo the pinwheel part.

BEFORE                                                                                  AFTER

Wednesday, March 9, 2011

Road Trip to the Tip

Saturday afternoon we loaded up in the car to check out some beaches and eat some food.  We headed north. 


For lunch we stopped at a small restaurant, there were no pictures and nothing in English.  I was tempted to just order the first 4 things on the menu.  When the cook came over we offered some English - "chicken"   - he went and asked another table if he could borrow their meal.  He showed us the dish and I ordered 3.  Jason was not about to eat chicken.  So we grilled the boys about how to say beef or cow, since the Chef did not understand.  Jayce told us how to say Pig.  Jason used his new found Japanese vocabulary and the waitress said "curry?"  Jason was able to enjoy Pork Curry.  Grahm and Charlotte chose to sit at the Japanese dining tables (I prefer to sit at the American tables when I have Tennyson on my lap).  Their boosters seats have toy squeakers in them.  Not a good idea if you want my kids to sit quietly.


We stopped at a couple of beaches to collect shells.  At one beach my boys decided to "make sea glass."  They had to get back in the car and didn't seem to think that it was a big deal.  Charlotte missed her nap so at on point she ran her nose right into a guard rail, I think she fell 100 times and in general was teary.  She really likes the beach and enjoyed every minute of it. 


At Cape Hedo there was several plaques and the only English that I saw had to do with peace.  It is too bad we can't read, I am sure we would have gotten more out of our trip had we understood the significance of the monuments.

Jason always takes pictures of the area and things. 
 
We saw a whale and Jason tried to catch it on film.


There is an endangered bird on the island called Yanbaru Kuina .  They have a building at Cape Hedo that is this bird.  We wound our way up a steep little road to get to it.  Then climbed stairs.


As we drove around we ended up in some very small villages tucked on the side of a "mountain."  We drove through several tunnels, 1 was 1km long.

We finally IDed a Pineapple growing wild.